The M22 is Plantronic’s latest go-to amplifier in their headset arsenal. With internal improvements that support today’s VOIP telephones, something the older M10 and M12 models couldn’t do, it’ll be there for you for years to come. Since it is the new and improved model, we often get calls regarding the different steps involved when installing an M22 amplifier. In our continuing efforts to keep our customers educated about Plantronics products, we herein include the steps necessary for a smooth installation of the M22 amplifier to your phone. Some of the steps may appear simplistic but we want to be thorough in our explanation.
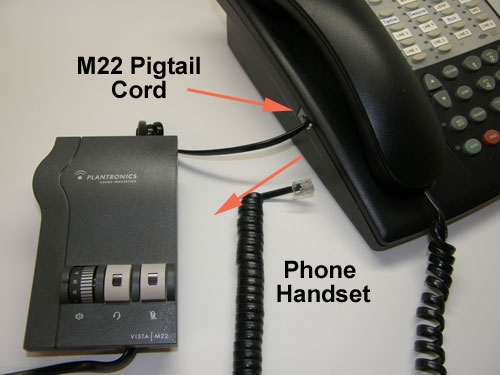
What’s in the box: Amplifier, short coiled cord to connect the amplifier to the phone (pigtail), long coiled cord to connect the amplifier to the headset via a quick-disconnect (QD cord), small package including the battery cover and side cover for compatibility scale/microphone volume control, and batteries. Now that you’ve confirmed none of the components are missing, let’s get started.
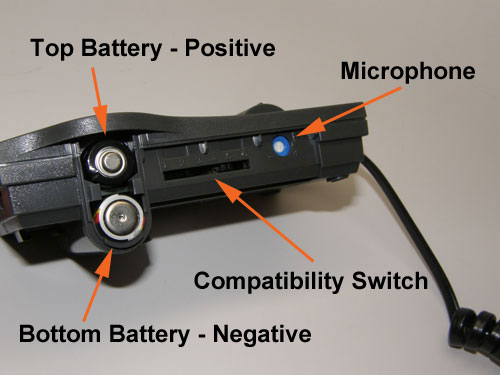
The first thing is to insert the batteries in, correctly. You may wrinkle your nose at such an easy step but it’s essential to making everything work right. You’ll notice that when you look inside the battery chamber, the circuit board has printed on top and bottom what ends of the batteries are suppose to be facing out. The top is positive and the bottom is negative.

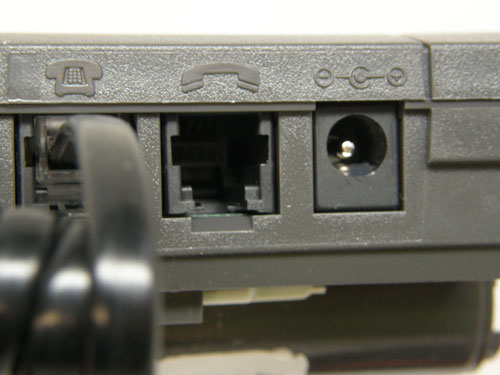
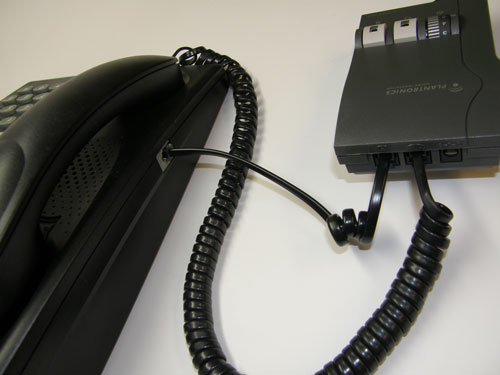
There are two square jacks on the back of the amplifier into which you can insert cables. There is also a round one for an AC adapter (purchased separately) if you don’t want to use batteries. First, you disconnect the handset (a.k.a. receiver) from the phone and connect it to the back of the amplifier where there’s a symbol of a handset. Then you take the short coiled cord that’s attached to the amplifier, under the telephone symbol, and connect it to the phone where the handset was previously connected. Finally you connect your Plantronics headset to the long coiled cord that’s attached to the opposite side of the amplifier. Now you’re ready to make adjustments.

Remember that to open up a line and get a dial tone, you’ll need to lift the handset off the phone.
Step one: Turn on the headset by depressing the middle button (headset symbol).
Step two: Remove the white adjustment tool from bottom of amplifier.
Step three: Remove the side cover (if it isn’t already off) located next to the battery compartment. You’ll notice a compatibility scale of 1-6. The amplifier comes preset to #5 since most phones operate under that setting. Make a call and if it sounds scratchy or distorted, move the indicator to one of the other numbers until you get a good, clear signal.

Now, don’t put the cover back on or hang up that call just yet, because now you’re ready for your final steps. We’re sure you noticed the volume wheel next to the headset button on the top of the amplifier. It controls the incoming volume through your headset speaker(s). With the same adjustment tool you can set the outgoing volume of your microphone or voice tube of your headset using the blue and white dial next to the compatibility scale. Counter clockwise (-) to lower and clockwise (+) to increase. Set it to desired volume. Now you’re ready to enjoy the world of hands-free communication.


Leave a Reply