Plantronics CS540 Setup, Installation, and Users Guide

(Plantronics CS540 setup guide is also for CS510, CS520, CS530 & -XD wireless headsets)
The following setup guide will show step-by-step how to setup, install, and start using your new Poly CS540 wireless headset. Please allow 60-90 minutes to charge the CS540 headset followed by 5-10 minutes to complete installation. Once setup is complete and you have tested the unit, allow 3 hours to fully charge the battery before your first full day of usage.
Last Updated – January 2023

Preview of What’s Ahead:
What’s in the Plantronics CS540 box.
Plantronics CS500 Training Video (5 minutes)
Step 1: Charge the CS540 Headset for 60-90 Minutes.
Step 2: Plug the Telephone Interface Cable into the Base.
Step 3: Connecting the CS540 to Your Telephone.
Step 4: Understanding Your CS540 Wireless Headset.
Step 5: Understanding Your CS540 Base Adjustments.
What’s in the Plantronics CS540 box:

Plantronics CS540 Setup/Installation Video (3 minutes):
Step 1: Charge the CS540 Headset for 20 Minutes.
Take the AC Power Supply adapter and plug one end into your wall outlet or power strip. The other end will plug into the back of the CS540 base, as shown in the following picture. Place the headset into the base. You will feel a snug pull when the two magnets pull ensuring a perfect fit. The charging LED will flash green when charging and turn solid green when fully charged. A 60-90 minute charge will be sufficient to complete the setup and installation. A 3-hour charge will be required for a fully charged headset.


Flashing Green = Charging
Solid Green = Fully Charged
Step 2: Plug the Telephone Interface Cable into the Base.

Step 3: Connecting the CS540 to Your Telephone.
You have four setup options for connecting your CS540 to your desk phone. It’s color coded so simply follow your Option/Color.
Option A) Install CS540 into standard desk phone without a headset port.
Option B) Install CS540 into standard desk phone with a headset port.
Option C) Install CS540 with HL10 handset lifter for remote answer and hang-up. (Sold Separately)
Option D) Install CS540 with an Electronic Hook-Switch Cable (EHS) for remote answer and hang-up. (Sold Separately)
Option A: CS540 Without a Headset Port on Your Telephone.
A-1) Unplug your telephone handset from the side of your phone.

A-2) Plug the small modular adapter of the Telephone Interface Cable into your telephone’s handset port.

A-3) Plug your telephone handset cord into the middle of the Telephone Interface Cable (black box).

You’re Done! To make a call, push the button on the side of the CS540 headset to turn the headset on. Lift your handset off the phone and set it on your desk. You should now hear a dial tone, or on some phones, you also need to press an available line to get a dial tone. When finished, place the handset back in the cradle to hang-up the call and push the button on the side of the CS540 to turn the headset off. Alternatively, you can leave the headset on at all times and simply remove your handset to take a call and replace when finished.
NOTE: If you don’t have a dial tone, don’t panic. You simply need to change the compatibility slide switch to work with your phone. See Step 5 Compatibility Slide Switch below.
Option B: CS540 With a Headset Port on Your Telephone.
B-1) Plug the Telephone Interface Cable into the headset port (usually located on the bottom of the phone).


You’re Done! To make a call, push the button on the side of the CS540 headset to turn the headset on. Press an available line button or your phone or “Headset Button” if available. You should now hear a dial tone. When finished, press the line button again, or “Headset Button”, to disconnect the call, and push the button on the side of the CS540 to turn the headset off. Alternatively, you can leave the headset on at all times and simply press the appropriate buttons on your telephone to take a call and replace when finished.
NOTE: If you don’t have a dial tone, don’t panic. You simply need to change the compatibility slide switch to work with your phone. See Step 5: Compatibility Slide Switch below.
Option C: CS540 with HL10 Handset Lifter for Remote Answer/Hang-up
C-1) Unplug your telephone handset from the side of your phone.
C-2) Plug the small modular adapter of the Telephone Interface Cable into your telephone’s handset port.
C-3) Plug your telephone handset cord into the middle of the Telephone Interface Cable (black box).
C-4) Plug the HL10 cable into the back of the CS540 base. Attach your HL10 Handset Lifter to your phone using the 3 included adhesive strips.
(NOTE: It’s best to do a test run to determine placement of the HL10 before you remove the backing of the strips.) You will want your HL10 as far back (away from you) as possible for best results.

You’re Done! To make a call, push the button on the side of the CS540 headset. The HL10 lifter will lift giving you a dial tone. When finished, push the button on the side of the CS540 to hang-up the call. When you have an incoming call, you will hear beeps in your ear indicating a call. If you choose to take the call, push the button on the CS540 headset to answer the call and press again when finished to hang-up the call. If you need to put the call on hold, or transfer the call, walk back to your phone and press the desired buttons.
NOTE: If you don’t have a dial tone, don’t panic. You simply need to change the compatibility slide switch to work with your phone. See Step 5: Compatibility Slide Switch below.
Option D: CS540 with Electronic Hookswitch Cable (EHS) for Remote Answer/Hang-up
D-1) Unplug your Telephone Interface Cable from the base (From Step 2) and store for future use – Do Not Throw It Away! In case you change phones in the future, you may need this cable, depending on compatibility.

D-2) Plug the Electronic Hookswitch (EHS) cable with the large modular clip and stereo plug into the back of the CS540 base.
")
D-3) Plug the other end of the Electronic Hookswitch Cable (EHS) into your telephone’s Headset Interface Port.
NOTE: Numerous EHS Cables exist for different telephone manufacturers.
With many variations, where and how you plug your EHS cable into your telephone will vary greatly.
Please see the documentation that was included with your specific EHS Cable for proper installation.
NOTE: You may also need to activate the EHS port on your phone for ‘Plantronics’ headset use.
You will find this setting within your phones menu/programming options.
Polycom for example: Menu > Settings > Basic > Preferences > Headset > Hook Switch Mode and change from Regular to Plantronics
 Setup")
You’re Done! To make a call, push the button on the side of the CS540 headset. You will hear a dial tone. When finished, push the button on the side of the CS540 to hang-up the call. When you have an incoming call, you will hear beeps in your ear indicating a call. If you choose to take the call, push the button on the CS540 headset to answer the call and press again when finished to hang-up the call. If you need to put the call on hold, or transfer the call, walk back to your phone and press the desired buttons.
NOTE: If you don’t have a dial tone, don’t panic. You simply need to change the compatibility slide switch to work with your phone. See Step 5: Compatibility Slide Switch below.
Step 4: Understanding Your Plantronics CS540 Wireless Headset Setup.
Your CS540 wireless headset has two buttons.
The first thing to understand is the Call Control Button. This is how you turn your headset on and off. This is also the button to press if you’re using the HL10 Handset Lifter or EHS Cable to answer/hang-up calls remotely while away from your desk. When the headset is in use, the LED indicator light will flash white.
The second button (or rocker switch) is located at the back of the headset and controls your speaker volume. When pushed up, it raises your speaker volume, and pushed down decreases the volume. You have 3 levels, so continue pressing for increased or decreased volume levels.
NOTE: If you find you’re still having trouble hearing your caller, or your caller is too loud and causing an echo or feedback, you will need to adjust your base volume setting (see Step 5 below). Think of it as your base being the major speaker volume adjustment and your headset being the minor speaker volume adjustment. Finding an adjustment on the base which allows your headset to be in a middle position will typically work best. This allows you to make a minor speaker adjustment from call to call if need be.
The second button (or rocker switch) also acts as your microphone mute button when pushed in. You will hear three high tone beeps indicating the microphone is muted and the LED light on the base will turn solid red. Pushing the button in again will deactivate the mute feature allowing your caller to hear you again.

Step 5: Understanding Your Plantronics CS540 Setup/Base Adjustments.
Your CS540 base has two volume adjustment dials (Speaker 1-4 & Microphone 1-6) and one compatibility slide switch (Labeled A-G).
The Speaker Volume dial (settings 1-4) is the major adjustment for what you hear. If you need to adjust it, turn the dial until you feel the dial slide into the next numbered position. Once you find a comfortable setting, remember from Step 4, you also have a fine tune speaker adjustment on the headset which allows you to make small volume adjustments from call to call. As you know each call you take is different so having a volume control on the headset lets you easily adjust as needed.
The Microphone Volume dial (settings 1-6) is what controls your microphone volume, or how well your caller hears you. Make sure to call a friend or co-worker for your first call and ask how you sound. Once you set this, your voice rarely changes, so you’ll usually set this during installation and never touch it again.
NOTE: If you hear an echo or feedback with your headset, it may be caused by your Microphone Volume being set slightly louder than it needs to be. You will always hear a little of your voice come through your headset speaker, which is called side tone. If you have too much side tone causing echo, turn down your Microphone Volume enough so your caller still hears you comfortably, but enough so the side tone is not distracting to you.
The Compatibility Slide Switch (settings A-G) is the true “Brains” of the Plantronics CS540 when setting it up. This adjustment is what configures the CS540 to work with hundreds, if not thousands of telephones currently on the market. Setting “A” is the default setting that works with most telephones. If you find you can’t hear you caller, your caller can’t hear you, or it sounds distorted, continue sliding to the next letter until you find the setting that sounds the best. Once set, you will not need to adjust the Compatibility Slide Switch again, unless you change phones.
Your Plantronics CS540 setup process should now be complete. If you continue to need assistance, visit Plantronics Support.

The Latest in Wireless Headset Solutions:
-
$228.37
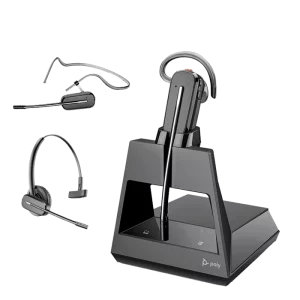 Poly Voyager 4245 Office Convertible Headset(Desk Phone + PC + Mobile) & Teams VersionSelect options
This product has multiple variants. The options may be chosen on the product page
Poly Voyager 4245 Office Convertible Headset(Desk Phone + PC + Mobile) & Teams VersionSelect options
This product has multiple variants. The options may be chosen on the product page
-
$469.00
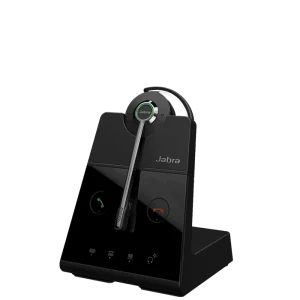 Jabra Engage 65 SE Convertible Wireless Headset(Desk Phone + PC)Add to cart
-
$360.88
 Poly Savi 8445 Office Wireless DECT Headset(Desk Phone + PC + Mobile) & Teams VersionSelect options
This product has multiple variants. The options may be chosen on the product page
Poly Savi 8445 Office Wireless DECT Headset(Desk Phone + PC + Mobile) & Teams VersionSelect options
This product has multiple variants. The options may be chosen on the product page
-
$149.00
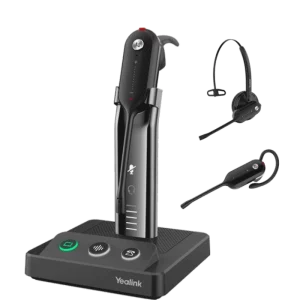 Yealink WH63 Wireless DECT Headset(Desk Phone + PC) & Teams VersionSelect options
This product has multiple variants. The options may be chosen on the product page
Yealink WH63 Wireless DECT Headset(Desk Phone + PC) & Teams VersionSelect options
This product has multiple variants. The options may be chosen on the product page