Plantronics CS55 Battery Replacement Instructions
How To Replace Your Plantronics CS55 Wireless Headset Battery
When the time comes to replace your Plantronics CS55 battery, you will first need to purchase the battery (Part number 64399-01 to order). When you’re ready to begin you will need a flat work space, a cloth or towel to work on so you don’t scratch your headset, a paper clip or small flat head screwdriver and 5-10 minutes of time. To start, simply follow the steps outlined below. When finished, place your headset in the base for a few hours allowing your new CS55 battery to charge. Replacing the CS55 battery can be challenging because you need to squeeze and lift the battery cover off while being careful not to break the two tabs holding it into place. With the steps and pictures provided below, you will know precisely where to apply pressure while not damaging the tabs for a successful replacement of your CS55 battery.
Step 1Remove the CS55 ear piece or headband by pulling away from the speaker. |
 |
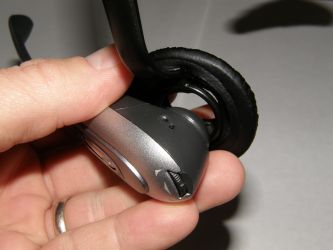
Step 2With your thumb and finger, squeeze the battery cover where the grooves are on both sides.
*** IMPORTANT *** You need to apply significant pressure to both sides so you don’t break the small tabs under the cover. See step 4 picture to understand the location of the tabs |
 |
Step 3Insert a paper clip or small screw driver under the battery cover and gently lift as you continue to squeeze the cover until the back lifts free. |
 |
Step 4There are two more tabs holding the front of the cover in place. Pull the cover back, towards the speaker, to remove without breaking tabs and lift away from the headset.
|
 |
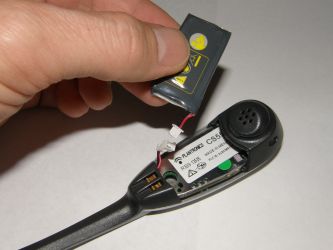
Step 5With the battery exposed, lift the front of the battery and pull forward, towards the microphone of the headset.
|
 |
Step 6With the battery removed, pull the two white connectors apart by grasping the plastic and not by pulling the wires.
Step 7You Are Half Way Done! Now reverse the steps to put the new battery back in, charge for a few hours and then your CS55 will be as good as new.
|
 |
